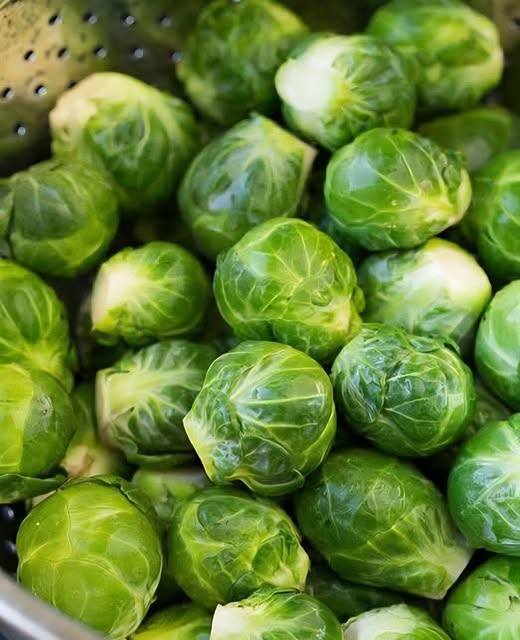
A tray of Brussels sprouts can produce two very different dinners. One is pale, watery, and forgotten beside the main dish. The other has browned edges, tender centers, and loose leaves that almost disappear before the tray reaches the table. The difference usually comes from preparation, space, heat, and when you add the finishing ingredients.
If your memories of this vegetable involve long boiling and a strong kitchen smell, it makes sense to be skeptical. You do not need to force yourself to enjoy that version. This guide focuses on a different approach: roasting the sprouts until their natural flavor becomes sweeter and their surfaces develop color. It also explains how to turn one basic tray into several different meals.
Start with a clear goal
Good roasted Brussels sprouts should have contrast. The cut sides should be deeply golden in places, while the centers remain tender enough for a fork. A few crisp outer leaves are welcome, but a tray of completely blackened leaves usually means that the smaller pieces cooked faster than the larger ones. The solution is to manage size and watch the tray, rather than chase one exact time.
Think of the following method as a reliable starting point for your own oven. Sprout size, pan material, crowding, and oven performance all affect cooking. Use the suggested timing to decide when to check, then let the color and tenderness guide the final few minutes. This is especially useful when cooking alongside another dish that changes the available oven space.
Choose sprouts that will cook evenly
Look for firm Brussels sprouts with reasonably tight leaves. Choose a batch that is similar in size whenever possible. If half the bag contains tiny sprouts and the other half contains very large ones, the smaller pieces may finish well before the larger centers soften. Sorting the batch takes a minute and makes the rest of the recipe easier.
Remove damaged outer leaves and inspect the stem ends. Trim away the dry tip without cutting so deeply that all the leaves fall apart. Rinse the sprouts and dry them thoroughly with a clean towel. Water left on the surface encourages steaming, particularly when the pan is crowded. Drying is a practical cooking step, not an optional detail reserved for professional kitchens.
Cut medium sprouts through the stem into halves. Quarter unusually large ones, and keep very small sprouts whole if that gives you pieces of comparable thickness. Save loose healthy leaves in a separate little pile. You can add them later in the roast, or remove them early if they brown ahead of the rest of the tray.
A flexible base recipe
For four modest side servings, start with about one pound, or 450 grams, of prepared Brussels sprouts. Use approximately two tablespoons of olive oil, half a teaspoon of fine salt as a starting point, and a few turns of black pepper. Salt brands and grain sizes vary, so adjust thoughtfully. You can always add a little more at the table.
Heat the oven to 425°F, about 220°C, using a conventional setting. If you normally cook with a fan oven, follow your appliance's usual temperature adjustment and check earlier. Choose a large rimmed metal baking tray. A small deep dish tends to hold moisture around the vegetables, while a broad shallow tray gives that moisture a better chance to escape.
Toss the dry sprouts with the oil and seasoning in a bowl. Turn them until the cut faces and outer leaves have a light coating, with no puddle of oil in the bottom. Spread them in one layer, placing most halves cut side down. Leave visible gaps. If a double batch covers every inch of the tray, use two trays instead of building a second layer.
Roast, check, and finish
Slide the tray into the hot oven and begin checking around twenty minutes. Many batches need roughly twenty-five to thirty-five minutes, depending on size and the oven. Turn a few pieces over to inspect the undersides. If the cut faces are golden and a fork enters the centers comfortably, the sprouts are close to ready.
Rotate the tray if one side of the oven browns more strongly. Stir or turn the sprouts once if needed, but avoid moving them every couple of minutes. Steady contact with the hot metal helps the cut faces develop color. Remove loose leaves that have become crisp before they burn, then return the larger pieces to finish cooking.
Taste one slightly cooled sprout before adding anything else. Decide whether it needs salt, acidity, sweetness, or simply more time. Add a squeeze of lemon or a small drizzle of balsamic after roasting. Finishing ingredients should make the vegetable taste more interesting, rather than hide the work you just did to create a crisp surface.
Why a crowded pan disappoints
Vegetables release moisture as they cook. When the pieces sit close together or overlap, that moisture collects around them. The oven may be hot, but the immediate environment around the sprouts remains damp. You can end up with soft vegetables that never develop the browned surfaces you expected, even after a surprisingly long roast.
The easy fix is usually more space. Divide the batch between trays, use the widest suitable pan you own, and avoid pouring extra liquid into the roasting tray. If you are cooking for a crowd, roast in batches and briefly reheat before serving. A little planning produces a better result than trying to squeeze the entire dinner into one undersized dish.
Add garlic without burning it
Garlic works beautifully with Brussels sprouts, but very finely chopped fresh garlic can darken before the vegetable is done. One option is to add minced garlic during the final part of cooking. Another is to stir a small amount of garlic powder into the initial seasoning. Both approaches are easier to control than scattering delicate garlic over a long roast.
For a simple lemon-garlic finish, combine a little olive oil with grated lemon zest and a small amount of finely grated garlic. Toss the hot cooked sprouts with just enough to coat, then add lemon juice to taste. Keep the dressing light so the browned edges remain the main attraction. Offer extra lemon separately for anyone who enjoys a sharper finish.
Five flavor directions to try
For a savory version, add freshly grated Parmesan after roasting. It will soften against the hot sprouts without needing a long second bake. Finish with black pepper and a little lemon. If you are serving guests, remember that Parmesan contains dairy and that traditional versions may not suit every vegetarian diet. Check the label when that distinction matters.
For a sweet and tangy version, use a modest drizzle of balsamic glaze and a few toasted nuts. Add both after cooking. Nuts provide crunch without requiring more time in the oven, but they are an allergen, so offer them separately when appropriate. A glaze is concentrated; start with less than you think you need and taste before adding more.
For gentle heat, mix a small spoonful of honey with a few drops of your preferred chili sauce. Toss with the cooked vegetables just before serving. For a smoky version, try smoked paprika in the initial seasoning and finish with lemon. For a fresh version, add chopped parsley, toasted breadcrumbs, and a little grated citrus zest at the table.
Make a bacon variation thoughtfully
If you enjoy bacon, cook it separately until crisp and drain it before scattering over the finished sprouts. This keeps the timing simple and makes it easier to control how much fat and salt enters the dish. It also allows you to set aside a portion of plain sprouts for guests who do not eat pork or prefer a meat-free side.
Avoid assuming that bacon alone will fix an undercooked or overcrowded tray. The basic vegetable still needs enough space and time to become tender. Once that foundation is right, a small amount of bacon can add a pleasant contrast. The same principle applies to cheese, rich sauces, and sweet glazes: use them as a finish, rather than a substitute for good roasting.
Turn a side dish into dinner
A tray of roasted sprouts can anchor a grain bowl. Spoon cooked rice, couscous, barley, or another grain into a bowl, then add sprouts, a protein you enjoy, and a simple dressing. Chickpeas, lentils, eggs, chicken, and tofu can all work. Choose one main flavor direction so the meal feels coordinated instead of becoming a collection of unrelated leftovers.
For pasta, reserve a little cooking water and combine it with olive oil, lemon, and grated cheese to make a light coating. Fold in chopped roasted sprouts near the end so they keep some texture. For a sandwich, layer cooled sprouts with a creamy spread and a contrasting crisp vegetable. Chop large pieces first so the filling is easy to bite through.
Roasted sprouts also work on pizza, but avoid piling a thick mountain over the dough. Use a thin layer of partially or fully cooked sprouts, depending on your pizza method, and keep the other toppings balanced. Too much wet sauce or heavy topping can soften the base. Add delicate finishes such as herbs and lemon after the pizza leaves the oven.
Preparing ahead without losing everything you like
You can trim and cut the sprouts ahead, then refrigerate them in a covered container. Keep them dry and follow your normal produce-storage practices. Measure seasoning and prepare any finishing sauce separately. When dinner approaches, all that remains is to heat the oven, toss the vegetables, and spread them on the tray.
For the best texture, roast close to serving time. If you need to cook earlier, let the sprouts cool briefly and refrigerate promptly rather than leaving them on the counter for hours. Reheat in a hot oven or air fryer, watching carefully. A microwave is convenient, but it usually softens crisp edges. Choose the method that suits the meal and your expectations.
Troubleshooting common results
If the sprouts are pale and soft, check for crowding, excess surface water, and insufficient heat. If the outside is dark but the middle stays hard, cut the next batch smaller or reduce the heat slightly after the initial browning. If the tray tastes greasy, use less oil and make sure it is distributed evenly rather than collecting underneath a few pieces.
If the flavor seems flat, try a small amount of acid before adding more rich ingredients. If the sprouts taste unpleasantly bitter to you, more thorough browning and a balanced finish may help, but personal taste varies. You do not need to pretend that one method will make everyone love the same vegetable. Serve a small portion and let people decide.
A practical plan for your first batch
Keep the first attempt simple: one tray, salt, pepper, oil, and lemon. Write down the size of the sprouts, the temperature you used, and when they looked ready. That quick note is more useful than comparing your oven with a photograph taken under different conditions. On the next batch, change only one thing, such as the finish or the cut size.
Serve the sprouts while the edges are still lively, with sauces and toppings nearby. Invite people to taste before adding extras. A well-roasted sprout can stand on its own, but the real advantage of this method is flexibility. Once you understand drying, spacing, and checking for doneness, you can build a version that fits your kitchen, your dinner, and the people around your table.
Before you bring the tray to the table
Check that the larger pieces are tender, transfer the sprouts to a wide serving dish, and keep the crisp leaves on top. A deep covered bowl traps steam and quickly softens those leaves. If the main dish needs a few more minutes, leaving the sprouts spread out briefly is usually better for texture than sealing them under a lid.
There is no need to buy special equipment for this approach. A sound tray, a sharp knife, a bowl, and a little attention are enough. Start with the tools you already own, make space for the vegetables, and use your senses as the final cooking guide. The best batch is the one you enjoy eating and can comfortably make again.
Original editorial guide. Topic source: article shared in Recipes from Grandma. Additional explanations and practical examples have been written for this guide.


0 commentaires:
Enregistrer un commentaire