Top Ad 728x90

jeudi 29 octobre 2026

The Cabinet Above the Fridge: A Practical Guide to Better Kitchen Storage

by

The Cabinet Above the Fridge: A Practical Guide to Better Kitchen Storage

The cabinet above a refrigerator often becomes the kitchen's least useful cupboard. It is high, sometimes deep, and easy to forget. A cake tin disappears behind a stack of containers, holiday decorations accumulate beside an appliance box, and nobody is sure what is actually at the back. The problem is usually less about the amount of space than the job you have assigned to it.

A better approach starts with a simple question: what can live here without making everyday cooking harder? This cupboard can be useful for occasional, manageable items that you can retrieve safely. It does not need to hold everything that failed to fit somewhere else. This guide walks through choosing a purpose, checking the space, organizing its contents, and keeping the arrangement useful over time.

Give the cupboard one main job

Before buying baskets or moving shelves, decide what the cabinet is for. It might become a home for lightweight seasonal baking tools, spare table linens, or a small collection of party supplies. A clear purpose makes the next decision easier: an item either supports that purpose or belongs elsewhere. Without one, every spare object looks like a possible candidate.

Do not worry about using every inch immediately. An organized cupboard with some empty space can be more useful than a full cupboard that requires a complicated unpacking operation. Your goal is to make selected items easier to locate while freeing more convenient storage for things you use often. Volume alone is a poor measure of whether a storage solution is working.

Inspect the location before filling it

Open the doors and look at the shelves, supports, hinges, and interior surfaces. Check for damage, sagging, loose hardware, or marks that suggest a problem. If a shelf seems unstable, resolve that issue before placing objects on it. Do not assume that a cabinet is suitable for a heavy load simply because it appears spacious or has held things there before.

Also consider how the refrigerator fits below it. Appliance ventilation requirements differ, so use the instructions for your actual refrigerator rather than a generic clearance measurement from an organizing article. Do not block designated vents or turn a required ventilation gap into another storage shelf. The cupboard's usefulness should be planned around the appliance, not at the expense of its installation requirements.

Check whether you can reach it comfortably

A storage location is only practical if you can get items in and out without an awkward struggle. Consider your height, strength, balance, and the clearance in front of the refrigerator. If reaching the rear shelf requires stretching over the appliance, choose a different kind of item or leave that part of the cupboard unused. You do not need to make every space serve the same person in the same way.

Use an appropriate stable step stool when needed, placed on a level surface according to its instructions. Avoid climbing on a chair, the countertop, or the refrigerator itself. Keep both the lifting task and the container size manageable. If you cannot retrieve an item without pulling it toward your face or losing a secure stance, it belongs in a lower location.

Empty it before designing the new arrangement

Take everything out in small manageable groups. Set the contents on a clear surface where you can see the whole collection. This is the moment to discover duplicates, incomplete sets, unfamiliar lids, and the appliance accessory nobody has used in years. Designing around the existing pile without examining it tends to preserve the same confusion in a prettier container.

Wipe the interior using a method suitable for the cabinet finish, then allow it to dry. Measure the usable width, depth, and height, including the space lost to hinges or the cabinet opening. A bin that fits on the shelf may still be impossible to slide through the doors. Write down the measurements before choosing any organizer, and check what you already own first.

Sort by use rather than by guilt

Create three temporary groups: items you use regularly, items you use occasionally, and items you no longer need. Regularly used kitchen tools usually deserve a more reachable cupboard. Occasional items may be candidates for the space above the fridge if their weight and size are suitable. Unused objects should not automatically earn permanent storage just because someone once paid for them.

Make the decisions specific. A cookie cutter used every December has a clear seasonal purpose. A broken lid without a matching container does not become useful when placed inside a labeled box. If you want to donate or recycle something, set it aside for that next action. Do not leave the outgoing pile blocking the kitchen while you continue rearranging the things you intend to keep.

Good candidates for the upper cupboard

Lightweight seasonal table linens are often easy to group and retrieve. Keep a holiday tablecloth with its matching napkins, or place picnic napkins and reusable party decorations together. A shallow labeled container can keep the collection from sliding into several corners. The important detail is that the complete container remains comfortable to lift when filled, not merely when empty.

Occasional baking tools can also fit this role. Think of lightweight cookie cutters, decorating bags, spare cake boards, or a modest collection of specialty molds. Group related pieces so you can take out one kit rather than searching for scattered parts. Keep sharp or fragile items protected in a way that does not create a surprise when someone reaches into the box.

Party supplies may work well if you avoid building an oversized stockpile. A few spare napkins, paper plates, or lightweight serving accessories can free up daily cupboards. Check the conditions in the cabinet and keep items clean and dry. Store only what you reasonably expect to use, rather than treating the cupboard as a reason to buy a year's worth of supplies you cannot easily inspect.

Items that usually deserve a lower home

Heavy appliances, large stacks of ceramic plates, and awkward glassware can be difficult to lift down from above head height. A rarely used item is not automatically a good candidate for high storage. Frequency matters, but so do weight, breakability, and grip. A substantial mixer used twice a year may still be better stored low, where it can be moved safely.

Daily mugs, breakfast bowls, lunch containers, and frequently used ingredients also tend to belong elsewhere. If you need a step stool for the same object every morning, the storage system is asking you to repeat an unnecessary task. Move the everyday item into an accessible zone and reserve the high cupboard for things that genuinely benefit from being out of the daily traffic.

Be thoughtful about food storage

Do not assume that the space above a refrigerator has the same conditions as a cool pantry. Temperature and ventilation depend on the kitchen and appliance installation. Keep products according to their labels, and choose another location when a food needs reliably cool conditions. The visual convenience of a spare shelf is not enough reason to ignore an item's storage requirements.

This is also a poor location for food you are likely to forget. When labels disappear behind other items, you may buy duplicates or discover packages long after you meant to use them. If you store any suitable pantry supplies here, keep the quantity modest, labels visible, and a review routine in place. A food cupboard should support rotation, not conceal a second inventory from the person doing the shopping.

Choose containers around the retrieval task

A bin should help you lift and locate its contents, not simply make the shelf look uniform. Choose a size you can hold securely with the intended contents inside. Check that handles are accessible and that the bin can clear the door opening. Two smaller containers may be easier to manage than one deep box that becomes heavy and unwieldy when full.

Transparent sides can help you see what is inside, while a clear label is useful when the contents are not visible from below. Opaque containers can work just as well if the categories are stable and easy to understand. Avoid buying a large matching set before testing one container in the actual cabinet. The best organizer is the one that fits your space and your hands.

Use labels that answer a real question

A useful label tells someone what they will find without having to open several boxes. 'Holiday cookie tools' is more helpful than 'Miscellaneous.' 'Picnic napkins and plates' is clearer than 'Party.' Choose ordinary words that everyone in the household understands. An elegant label does not help if only the person who made it knows what the category means.

Place the label where you can read it from a comfortable standing position. If a container must face a particular direction for its handle to work, put the label on that side. Include a brief list only when it solves a recurring problem. You do not need a detailed inventory spreadsheet for three small bins, but a simple note can help when seasonal items are easy to forget.

Arrange the shelf from front to back

Place the easiest-to-retrieve containers at the front, with any less accessible items behind only if that arrangement remains safe and sensible. Avoid creating a wall of objects that must be removed before you can inspect the rear. A deep cupboard is not an invitation to bury everything. Sometimes using only the front portion is the most practical choice.

If you keep a rear item, make its location clear and leave an uncomplicated path to it. Do not balance a fragile object on top of a lidded bin just to use vertical space. The arrangement should remain stable when someone removes one piece. Imagine the cupboard being used by another household member who has not memorized your packing sequence; that is a useful test of the design.

A realistic example with three categories

Suppose the cupboard currently contains a heavy blender, spare mugs, cookie cutters, picnic supplies, and folded festive linens. Move the blender to a suitable lower location and put everyday mugs within easy reach. Keep the remaining items in three manageable groups: baking decorations, picnic supplies, and seasonal textiles. You have improved the cupboard mainly by deciding what does not belong there.

Before putting everything back, lift each container at a safe low level to judge its weight and grip. Then place it in the cabinet and practice retrieving it with the step stool if one is needed. If the movement feels awkward, revise the contents or location immediately. A storage plan should pass a real-use check, not just look tidy in a photograph taken after the doors are opened.

Make the system work for the household

Tell other people what the cupboard is now for and show them where the categories live. If everyone treats it as the destination for anything left on the counter, the clutter will return quickly. A short explanation can be enough: seasonal supplies go here, everyday items stay lower, and nothing is added without checking the weight and available space.

Consider who will actually retrieve the contents. A setup comfortable for one tall adult may be unsuitable for someone else. Do not require children or anyone with balance or mobility limitations to use high storage for things they need independently. Put shared essentials where the relevant people can access them, and treat the high cupboard as optional supporting space rather than the kitchen's main working zone.

Review it at natural intervals

You do not need to reorganize the cupboard every weekend. Check it when you put seasonal items away, prepare for a gathering, or notice that a bin is becoming difficult to close. Remove unrelated objects before they create a new miscellaneous category. These small reviews preserve the original purpose without turning organization into another demanding household project.

During the review, ask whether every category is still useful, whether the containers remain manageable, and whether anything should move to a more accessible place. Household routines change. A baking kit you once used only at holidays may become a weekly activity, in which case it deserves a better position. Good storage follows real habits rather than forcing habits to follow an old arrangement.

The cupboard does not need to be full

The cabinet above the fridge can be useful, but it is not a storage challenge you must win. Leaving some or all of it empty is reasonable if reaching it is difficult, the shelf is unsuitable, or you have no appropriate contents. Empty space is preferable to an arrangement that creates strain or hides objects you will buy again because you cannot find them.

Start with one clear purpose, keep the load manageable, respect the refrigerator's ventilation instructions, and test the retrieval process. Those decisions matter more than a fashionable basket or a perfectly matching label. When the cupboard supports your kitchen instead of collecting its leftovers, even a modest amount of well-chosen storage can make the everyday cupboards feel easier to use.


Original editorial guide. Topic source: article shared in Recipes from Grandma. Additional explanations and practical examples have been written for this guide.

A Takeout Tip Prompt Sparked an Argument: How to Handle the Moment Respectfully

by

A Takeout Tip Prompt Sparked an Argument: How to Handle the Moment Respectfully

A customer arrives at a restaurant to collect a takeout order. The food is ready, the cashier turns the payment screen around, and a suggested tip appears. The customer feels that collecting the meal personally should settle the matter. The employee, meanwhile, may be thinking about the work that happened before the bag reached the counter. A transaction that should take seconds suddenly feels uncomfortable.

A short story shared in Recipes from Grandma describes a father encountering a twenty-percent suggestion at pickup, declining to tip, and leaving frustrated. The account does not independently establish the event, the restaurant's policies, or the employee's intentions. It is best read as a discussion prompt. The useful question is how to make a personal decision without turning the person at the counter into an opponent.

Separate the choice from the interaction

There are two questions hidden inside the argument. The first is whether a customer wants to leave a voluntary tip for takeout. The second is how that customer communicates the decision. People can disagree on the first while agreeing that the second should involve basic courtesy. A calm refusal and a public confrontation are different actions, even if they lead to the same amount on the receipt.

Keeping those questions separate prevents the discussion from becoming a contest over who deserves embarrassment. Someone who chooses not to add a voluntary tip can still thank the staff. Someone who supports tipping can acknowledge that a customer may have a budget or a different understanding of the transaction. Neither side needs to invent motives for a stranger to explain its own preference.

What the screen actually tells you

A preset percentage shows that the payment system offers that option. By itself, it does not tell you who selected the settings, how often they are changed, or how tips are distributed. The cashier standing beside the terminal may have little control over its design. Treating the screen as a personal demand from that employee can start an argument on an assumption.

Read the available options before reacting. A voluntary prompt may allow a custom amount or no tip, while an order may also include separately listed charges. If a line item is unclear, ask what it represents. You do not need to announce a position to the whole queue. A brief factual question is usually more productive than assuming that every suggested amount is mandatory.

Why a customer may feel pressured

Payment happens in a social setting. There may be people waiting behind you, an employee watching for the transaction to finish, and large buttons presenting amounts you did not plan to spend. Even when a choice is voluntary, that setting can make it feel less private. Feeling uncomfortable does not automatically mean anyone intended to pressure you, but the feeling can still be real.

One helpful response is to decide your approach before arriving. You might leave a small amount when an order involves extra help, reserve tipping for certain kinds of service, or choose not to add a voluntary tip for routine pickup. The point is to make an intentional decision that fits your circumstances, rather than making an angry decision because you feel surprised.

What takeout work can involve

A packed order may require checking items, organizing sauces, labeling containers, keeping hot and cold components separate, and resolving missing details. The customer may not see those tasks. Recognizing that work is a way to understand why some people choose to tip, even when they are not receiving table service. It does not settle every question about how a restaurant should price or compensate that work.

At the same time, the amount of effort can vary considerably between orders and businesses. A simple ready-to-go meal and a large customized order are not identical situations. You do not have to pretend that every pickup is the same to respect the staff. A more useful conversation describes the specific service involved instead of building an absolute rule from one brief encounter.

A budget is a legitimate consideration

People have different amounts of money available for restaurant food. A person may be collecting a single inexpensive meal after work or buying dinner for several people. An unexpected extra amount can matter. Deciding what you can comfortably spend before placing the order helps you avoid making a rushed choice at the counter that you later resent.

That planning can include reviewing the total, delivery or service charges if relevant, and the amount you are willing to add voluntarily. If the total exceeds your budget, choose a different order or restaurant next time. There is no need to turn a private financial boundary into a speech directed at a worker who cannot change your budget or the business model during checkout.

The shortest respectful response

If a tip is voluntary and you choose not to add one, select the appropriate option, complete payment, and say thank you. You do not owe the queue an explanation. If the screen is confusing, ask, 'Where is the option to continue without adding a tip?' This keeps the request focused on the interface rather than accusing the employee of doing something wrong.

If you decide to tip a different amount, use the custom option when available. Take a moment to check the total before confirming. Being deliberate is not rude. Rushing because you feel watched can lead to an accidental amount and a more awkward conversation afterward. Calm attention is a better response to discomfort than either apologizing excessively or escalating the exchange.

When an explanation is useful

Sometimes an employee asks a practical question because a payment has not completed, not because they are challenging your choice. Answer the question that was actually asked. If the issue is a card reader, a stalled screen, or an unclear button, work together to finish the transaction. Do not assume that a pause after selecting no tip is evidence of disapproval.

If someone does challenge your choice, keep your response brief and personal: 'I am going to keep the total as shown today.' You can repeat that boundary without arguing about all restaurants everywhere. If the exchange becomes unpleasant, ask to speak calmly with a manager or follow up later. The immediate goal is to resolve your order, not win an audience.

Why confronting the cashier misses the larger issue

Questions about wages, menu pricing, software defaults, and business policy belong to a wider discussion. The worker completing the order may not control any of them. An angry comment at the counter can leave that person carrying the discomfort while the policy remains unchanged. It can also make other customers anxious without helping them understand what happened.

A complaint is more useful when it identifies an observable issue and reaches someone who can address it. For example, you might explain that the tip screen made the no-tip option hard to find, or that a charge was not clear before payment. Avoid claiming that staff were greedy or dishonest unless you have actual evidence for that accusation. Describe the interaction rather than guessing at character.

A better message to the business

If you want to offer feedback, keep it specific: 'I collected an order today and had difficulty finding the custom-tip option. Clearer choices would make checkout easier.' That message identifies a design problem without asking management to punish an employee for standing beside the terminal. It also gives the business something concrete to review.

If the issue was the way an employee spoke to you, describe the words or conduct accurately and leave room for context. Do not exaggerate a disagreement into a dramatic story for attention. The strongest complaint is usually the one that can be understood and assessed from the facts you provide. A respectful message can be firm without becoming a public attack.

Consider the employee's perspective without assuming it

An employee may be trying to move a queue, check an order, solve a payment issue, or simply finish a long shift. Silence might mean concentration. A brief expression might mean confusion. You cannot reliably infer a person's opinion of you from a second of body language at a busy counter. That uncertainty is a reason to remain measured, not a reason to dismiss your own experience.

The same courtesy works in the other direction. A customer selecting no tip may be budgeting, following a personal rule, or misunderstanding the screen. That choice does not reveal the customer's entire attitude toward workers. Conversations improve when both sides stop using one payment choice as a complete moral portrait of the person standing opposite them.

Talking about it with family

A family disagreement after the pickup can become more interesting if you ask what each person values. One person may focus on the visible service, another on the work behind the counter, and another on the stress of unexpected prompts. Those are different concerns. Naming them helps you understand why people reach different conclusions without assuming that one person is simply unkind.

Try asking, 'What would change your decision?' Perhaps extra assistance, a complicated order, a regular relationship with the restaurant, or a clearly stated policy would matter. If nothing would change the answer, you can still accept that the other person has a consistent preference. The conversation does not need to end with everyone adopting one universal rule.

Three possible versions of the same pickup

In the first version, a customer selects no tip, thanks the cashier, and leaves with the correct order. In the second, the customer leaves a modest voluntary amount after staff solve a problem with the order. In the third, the customer is surprised by the prompt and asks how to enter a custom amount. All three can be ordinary, respectful interactions.

Now imagine each version accompanied by sarcasm, an accusation, or a speech to the queue. The amount on the receipt has not necessarily changed, but the social experience has. This is why judging the story only by the tip percentage misses an important part of it. The way people manage a boundary often determines whether a brief disagreement becomes an unnecessary conflict.

Avoid turning one story into a national rule

Tipping customs differ between places, services, and businesses. A short account online cannot establish the correct expectation for every reader. It may also omit details such as what was ordered, whether staff provided extra assistance, or what the payment screen actually displayed. Treating the story as proof that all customers or all employees behave a certain way is not justified.

If you are somewhere unfamiliar, learn the local custom from a reliable local source and check the establishment's stated information. This article does not prescribe one percentage for every country or every situation. Its focus is the behavior that remains useful across many settings: read the total, ask clear questions, make a deliberate choice, and speak respectfully.

A practical checklist before checkout

Before you reach the counter, know your order, have your payment method ready, and decide whether you want to add a voluntary amount. At the screen, check the item total and any listed charges. If something is unclear, ask one direct question. After paying, check that you have the correct bag and any necessary items before leaving.

This routine keeps attention on the actual transaction. It also reduces the chance of discovering a missing item later and blaming the tip interaction for everything that went wrong. A correct order, a clear total, and a calm exchange are practical goals that both customer and staff can work toward, regardless of whether a voluntary tip is added.

What the father's story can teach

The account describes frustration over a suggested tip, but it does not give enough verified detail to judge every person involved. You can discuss the principle without pretending to know the cashier's motives or the father's full tone. The question worth carrying forward is how you want to behave when a routine interaction catches you off guard.

You can hold a firm boundary about spending and still acknowledge someone else's work. You can appreciate restaurant staff and still want clearer prices and payment screens. Those positions can coexist. The next time a prompt appears, take a breath, read the options, choose intentionally, and let a brief thank-you close the exchange rather than allowing a screen to set the tone for the whole evening.

A question worth discussing

Instead of asking only whether everyone must tip or nobody should tip, ask what makes a checkout feel fair and understandable. Clear information, visible options, consistent communication, and respectful treatment are things many people can agree on. Those shared expectations offer a better starting point for discussion than competing stories about the worst customer or the most demanding employee.

If you share this topic with friends, invite different experiences without asking people to shame a named worker or business. Describe the situation as a dilemma and keep the conversation focused on choices and conduct. A useful discussion should leave people better prepared for their next encounter, not simply more irritated about an interaction they were never present to observe.


Original editorial guide. Topic source: article shared in Recipes from Grandma. Additional explanations and practical examples have been written for this guide.
The White String in an Egg: What the Chalaza Is and What to Do with It

by

The White String in an Egg: What the Chalaza Is and What to Do with It

You crack an egg into a bowl, reach for the whisk, and notice something that looks like a tiny white rope beside the yolk. It may cling to the yellow surface or stretch into the surrounding white. For a moment, an ordinary breakfast can become a kitchen mystery. Should you remove it, throw the egg away, or carry on cooking?

That recognizable white strand is called a chalaza. It belongs to the egg's normal structure. Knowing its name helps, but the most useful answer also explains what it does, how it behaves in different recipes, and why its presence cannot replace proper egg handling. This guide brings those questions together so you can make the next cooking decision calmly.

The short explanation

Chalazae are the twisted whitish strands that help keep the yolk centered within the egg white. The singular word is chalaza. You may see one clearly and barely notice the other, because size, density, and the way the egg lands in the bowl affect what is visible. The strand itself is not a reason to discard an otherwise properly handled egg.

University of Illinois Extension describes these structures on opposite sides of the yolk and notes that they do not change the egg's nutritional value or cooking performance. This is a helpful distinction: a normal structure can look unfamiliar without being a defect. Understanding the anatomy gives you a better explanation than the dramatic guesses that often accompany a close-up photograph online.

How to recognize it in the bowl

Look for an opaque white twist near the yolk rather than a separate object sitting somewhere else on the plate. It can resemble a short ribbon, a little knot, or a thin cord. It is easiest to notice against a darker bowl or beside a bright yolk, which is why a photograph may make it appear more striking than it does during everyday cooking.

Do not assume that every unusual thing found in food is a chalaza. This guide explains the familiar white anchoring strand; it is not a way to identify every possible foreign object from a description. If something looks substantially different, keep it separate and seek reliable identification rather than relying on a reassuring label that may not apply.

Why the internet makes it seem alarming

A photograph removes context. An egg cracked into a pan has several textures at once: transparent areas, cloudy areas, thicker white, a rounded yolk, and small strands. Cropping tightly around one detail can make a normal structure look like something mysterious. Add an anxious caption, and the image can spread faster than a careful explanation.

The practical response is to ask whether the explanation matches a recognized part of an egg. A named structure described by an agricultural or university source is more useful than a comment that simply says it looks frightening. You do not need to memorize every part of egg anatomy. A few clear distinctions are enough to prevent unnecessary waste and confusion.

It does not establish fertilization

Seeing a white rope is not a dependable way to decide whether an egg was fertilized. The chalaza and the structures involved in embryo development are different things. A normal-looking strand does not tell the story people sometimes attach to it, and describing it as an umbilical cord gives the wrong impression of how an egg is organized.

For a home cook, the relevant question is usually much simpler: does the recipe need a smooth mixture, or can the egg go directly into the pan? You can answer that question without turning breakfast into a biology experiment. Leave questions about breeding and hatching to sources that specifically address those topics, rather than inferring them from one visible strand.

What freshness clues can and cannot tell you

Egg-industry anatomy diagrams describe more prominent chalazae as a characteristic associated with fresher eggs. That observation concerns a visible feature, not a guarantee that a particular egg is safe. A photograph of the white strand cannot reveal the complete storage history, tell you whether refrigeration was maintained, or rule out bacteria that are too small to see.

Keep the difference between appearance, quality, and safety in mind. A cook might notice that one egg holds its shape more neatly than another, yet still need to handle both properly. Avoid turning a single visual clue into a pass-or-fail safety test. The better habit is to combine ordinary inspection with the storage and cooking guidance appropriate to the eggs you bought.

Should you pick it out before scrambling?

For an everyday scramble, removing the chalaza is generally unnecessary. Beat the eggs until the yolks and whites are combined, then follow your chosen cooking method. A small strand that was obvious in the raw egg usually attracts far less attention once the mixture is broken up and cooked. Picking through every egg can add work without improving that kind of breakfast.

If the sight bothers you, you can remove the visible strand with a clean utensil. Treat this as a personal texture preference, not a required cleaning procedure. Work efficiently and keep the rest of the preparation hygienic. Spending several minutes chasing a tiny cord around a warm bowl is rarely the most helpful use of your cooking attention.

Fried eggs and omelets

When frying an egg, the white sets around the yolk and changes from translucent to opaque. The strand often becomes less noticeable among those cooked textures. If presentation matters, crack the egg into a small bowl first. You can inspect it, remove a fragment of shell, and slide it into the pan more neatly than when cracking directly over hot oil.

For omelets, a fork or whisk distributes the white and yolk before cooking. Focus on the actual recipe variables: the amount of filling, pan temperature, and how quickly the mixture sets. Overloading an omelet with wet vegetables is much more likely to change the finished texture than leaving a normal chalaza in the beaten eggs.

When straining is useful

Some recipes are designed around an exceptionally even texture. Custards, pastry creams, and curds are examples where a fine sieve can be helpful. Straining a mixture may remove a visible strand along with small bits that did not blend fully. The aim is a smooth finished dish, rather than making an ordinary part of the egg acceptable to eat.

Set a clean fine-mesh sieve over a suitable bowl and pour the mixture through gently. Follow the recipe about when to strain, because some methods call for straining before cooking and others afterward. Do not press cooked lumps through just to make the sieve empty. That can defeat the purpose of removing them in the first place.

A calm workflow for baking

When a recipe uses several eggs, crack each into a small separate bowl before transferring it to the main mixing bowl. This gives you a chance to spot shell fragments and inspect the contents without disturbing the full batch. It is especially convenient when the mixing bowl already contains butter, sugar, flour, or other ingredients that would make a problem harder to isolate.

Once the egg looks normal for its type and has been handled appropriately, add it as directed. If the recipe needs separated eggs, keep the whites and yolks organized in clearly different bowls. A chalaza near the yolk can look untidy during separation, but you should not confuse that visual detail with the more practical issue of accidentally mixing yolk into whites intended for whipping.

What actually belongs on an egg-safety checklist

The FDA advises choosing refrigerated eggs with clean, uncracked shells, refrigerating them promptly at 40°F or below, and cooking eggs until both yolk and white are firm. It also recommends pasteurized eggs or egg products for dishes served raw or undercooked. These handling steps matter more than whether a normal white strand is visible.

For casseroles and other egg dishes, FDA guidance specifies 160°F, checked with a food thermometer. Wash hands and food-contact surfaces after handling raw eggs. Do not taste raw batter as a way to judge quality. The full FDA guidance linked below gives additional storage and serving details; follow it alongside relevant local advice and the instructions on your product.

A good bowl setup saves effort

Before starting, place a small cracking bowl, your main mixing bowl, a clean utensil, and a place for discarded shells within reach. This simple arrangement prevents dripping raw egg across the counter while you search for another dish. It also makes it easier to inspect a visible strand without touching handles, cupboards, and your phone with messy hands.

If you want to photograph the egg to ask a question, do so without turning the phone into another food-contact surface. Set it down away from the preparation area and clean your hands before handling it. Then return to cooking or refrigeration promptly. A clear photograph can help identify a normal feature, but it does not justify leaving ingredients out while a comment thread develops.

Explaining it to someone who is worried

Start with the name and function in one plain sentence: the white twist helps hold the yolk in place. Avoid teasing someone for noticing it. Many people use eggs for years without closely examining what lands in the bowl. When they finally notice a detail, a calm explanation is more persuasive than a dismissive reply or an exaggerated promise.

You can show an egg-anatomy diagram from a reliable source and point out the same structure. Keep the reassurance specific. Saying that a chalaza is normal is accurate; saying that the entire egg must therefore be safe goes beyond what the feature establishes. That distinction lets you reassure someone without replacing sensible food handling with certainty you cannot support.

Frequently asked kitchen questions

Can you leave it in cake batter? In ordinary cake batter, yes: follow the mixing directions and do not treat the strand as an ingredient that must be removed. If a particular recipe asks you to sieve eggs, follow that instruction for the desired texture. The recipe's method is a better guide than a blanket rule that every egg needs the same extra step.

Will removing it make a custard perfect? No. Smooth custard also depends on the recipe proportions, how ingredients are combined, and the cooking method. Straining can help with small solids, but it cannot repair every problem caused by overheating or a badly balanced recipe. Think of a sieve as one useful tool within the method, rather than a shortcut around the method.

Can you judge safety by smell alone? A clearly unpleasant smell is a reason to stop using an egg, but the absence of such a smell does not prove it is free from harmful bacteria. Avoid tasting an uncertain egg. If its handling history is doubtful, use reliable food-safety guidance instead of trying to settle the question from the strand, the yolk color, or a single sensory clue.

A simple example for the next breakfast

Imagine you are making two eggs for toast. Crack the first into a small bowl and notice the white cord. Recognize the familiar structure, check that you have no shell fragments, and transfer the egg to your cooking vessel. Repeat with the second. Follow your cooking method and the applicable safety guidance, then wash the raw-egg utensils and your hands.

For a dessert, the same inspection step can lead to a different texture choice. Combine the eggs as the recipe directs and strain when instructed. Neither breakfast nor dessert needs a dramatic response to normal anatomy. What changes is the texture you are aiming for, not the basic identity of the white strand.

Keep the useful distinction

The chalaza answers an anatomy question. Refrigeration, clean handling, and cooking answer different questions about preparation and food safety. Once those jobs are separated, the mystery becomes manageable. You can leave the strand in many everyday dishes, strain a mixture when a smooth texture matters, and still take the handling of raw eggs seriously.

Next time you see that little white twist, you will have a name for it and a practical plan. You do not need to chase every internet rumor or waste a normal ingredient because a close-up looked unfamiliar. Use the explanation, match your preparation to the recipe, and let reliable handling guidance make the important decisions.

References for the curious cook

For the anatomical description, consult University of Illinois Extension's Eggs Structure page and the American Egg Board's egg diagram. For buying, storing, cooking, and serving advice, consult the FDA's What You Need to Know About Egg Safety. These references answer different questions, which is why it is useful to keep both an anatomy source and a food-safety source available.

The article shared in the Facebook group introduced the white-string question; the practical workflows and examples in this guide are additional editorial material. They are intended to make the explanation usable at the counter, whether you are preparing a quick omelet, mixing a cake, or following a dessert recipe that needs a particularly smooth finish.

Further reading: University of Illinois Extension: Eggs Structure; American Egg Board: Egg Diagram; FDA: Egg Safety.


Original editorial guide. Topic source: article shared in Recipes from Grandma. Additional explanations and practical examples have been written for this guide.

Crispy Brussels Sprouts: A Complete Guide to Turning Skeptics into Fans

by

Crispy Brussels Sprouts: A Complete Guide to Turning Skeptics into Fans

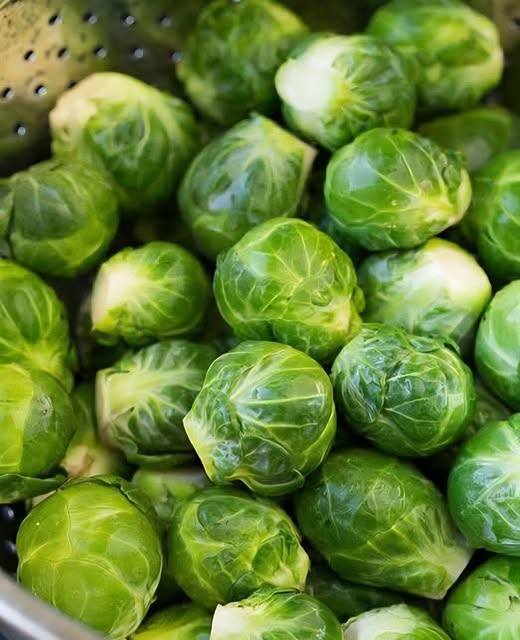
A tray of Brussels sprouts can produce two very different dinners. One is pale, watery, and forgotten beside the main dish. The other has browned edges, tender centers, and loose leaves that almost disappear before the tray reaches the table. The difference usually comes from preparation, space, heat, and when you add the finishing ingredients.

If your memories of this vegetable involve long boiling and a strong kitchen smell, it makes sense to be skeptical. You do not need to force yourself to enjoy that version. This guide focuses on a different approach: roasting the sprouts until their natural flavor becomes sweeter and their surfaces develop color. It also explains how to turn one basic tray into several different meals.

Start with a clear goal

Good roasted Brussels sprouts should have contrast. The cut sides should be deeply golden in places, while the centers remain tender enough for a fork. A few crisp outer leaves are welcome, but a tray of completely blackened leaves usually means that the smaller pieces cooked faster than the larger ones. The solution is to manage size and watch the tray, rather than chase one exact time.

Think of the following method as a reliable starting point for your own oven. Sprout size, pan material, crowding, and oven performance all affect cooking. Use the suggested timing to decide when to check, then let the color and tenderness guide the final few minutes. This is especially useful when cooking alongside another dish that changes the available oven space.

Choose sprouts that will cook evenly

Look for firm Brussels sprouts with reasonably tight leaves. Choose a batch that is similar in size whenever possible. If half the bag contains tiny sprouts and the other half contains very large ones, the smaller pieces may finish well before the larger centers soften. Sorting the batch takes a minute and makes the rest of the recipe easier.

Remove damaged outer leaves and inspect the stem ends. Trim away the dry tip without cutting so deeply that all the leaves fall apart. Rinse the sprouts and dry them thoroughly with a clean towel. Water left on the surface encourages steaming, particularly when the pan is crowded. Drying is a practical cooking step, not an optional detail reserved for professional kitchens.

Cut medium sprouts through the stem into halves. Quarter unusually large ones, and keep very small sprouts whole if that gives you pieces of comparable thickness. Save loose healthy leaves in a separate little pile. You can add them later in the roast, or remove them early if they brown ahead of the rest of the tray.

A flexible base recipe

For four modest side servings, start with about one pound, or 450 grams, of prepared Brussels sprouts. Use approximately two tablespoons of olive oil, half a teaspoon of fine salt as a starting point, and a few turns of black pepper. Salt brands and grain sizes vary, so adjust thoughtfully. You can always add a little more at the table.

Heat the oven to 425°F, about 220°C, using a conventional setting. If you normally cook with a fan oven, follow your appliance's usual temperature adjustment and check earlier. Choose a large rimmed metal baking tray. A small deep dish tends to hold moisture around the vegetables, while a broad shallow tray gives that moisture a better chance to escape.

Toss the dry sprouts with the oil and seasoning in a bowl. Turn them until the cut faces and outer leaves have a light coating, with no puddle of oil in the bottom. Spread them in one layer, placing most halves cut side down. Leave visible gaps. If a double batch covers every inch of the tray, use two trays instead of building a second layer.

Roast, check, and finish

Slide the tray into the hot oven and begin checking around twenty minutes. Many batches need roughly twenty-five to thirty-five minutes, depending on size and the oven. Turn a few pieces over to inspect the undersides. If the cut faces are golden and a fork enters the centers comfortably, the sprouts are close to ready.

Rotate the tray if one side of the oven browns more strongly. Stir or turn the sprouts once if needed, but avoid moving them every couple of minutes. Steady contact with the hot metal helps the cut faces develop color. Remove loose leaves that have become crisp before they burn, then return the larger pieces to finish cooking.

Taste one slightly cooled sprout before adding anything else. Decide whether it needs salt, acidity, sweetness, or simply more time. Add a squeeze of lemon or a small drizzle of balsamic after roasting. Finishing ingredients should make the vegetable taste more interesting, rather than hide the work you just did to create a crisp surface.

Why a crowded pan disappoints

Vegetables release moisture as they cook. When the pieces sit close together or overlap, that moisture collects around them. The oven may be hot, but the immediate environment around the sprouts remains damp. You can end up with soft vegetables that never develop the browned surfaces you expected, even after a surprisingly long roast.

The easy fix is usually more space. Divide the batch between trays, use the widest suitable pan you own, and avoid pouring extra liquid into the roasting tray. If you are cooking for a crowd, roast in batches and briefly reheat before serving. A little planning produces a better result than trying to squeeze the entire dinner into one undersized dish.

Add garlic without burning it

Garlic works beautifully with Brussels sprouts, but very finely chopped fresh garlic can darken before the vegetable is done. One option is to add minced garlic during the final part of cooking. Another is to stir a small amount of garlic powder into the initial seasoning. Both approaches are easier to control than scattering delicate garlic over a long roast.

For a simple lemon-garlic finish, combine a little olive oil with grated lemon zest and a small amount of finely grated garlic. Toss the hot cooked sprouts with just enough to coat, then add lemon juice to taste. Keep the dressing light so the browned edges remain the main attraction. Offer extra lemon separately for anyone who enjoys a sharper finish.

Five flavor directions to try

For a savory version, add freshly grated Parmesan after roasting. It will soften against the hot sprouts without needing a long second bake. Finish with black pepper and a little lemon. If you are serving guests, remember that Parmesan contains dairy and that traditional versions may not suit every vegetarian diet. Check the label when that distinction matters.

For a sweet and tangy version, use a modest drizzle of balsamic glaze and a few toasted nuts. Add both after cooking. Nuts provide crunch without requiring more time in the oven, but they are an allergen, so offer them separately when appropriate. A glaze is concentrated; start with less than you think you need and taste before adding more.

For gentle heat, mix a small spoonful of honey with a few drops of your preferred chili sauce. Toss with the cooked vegetables just before serving. For a smoky version, try smoked paprika in the initial seasoning and finish with lemon. For a fresh version, add chopped parsley, toasted breadcrumbs, and a little grated citrus zest at the table.

Make a bacon variation thoughtfully

If you enjoy bacon, cook it separately until crisp and drain it before scattering over the finished sprouts. This keeps the timing simple and makes it easier to control how much fat and salt enters the dish. It also allows you to set aside a portion of plain sprouts for guests who do not eat pork or prefer a meat-free side.

Avoid assuming that bacon alone will fix an undercooked or overcrowded tray. The basic vegetable still needs enough space and time to become tender. Once that foundation is right, a small amount of bacon can add a pleasant contrast. The same principle applies to cheese, rich sauces, and sweet glazes: use them as a finish, rather than a substitute for good roasting.

Turn a side dish into dinner

A tray of roasted sprouts can anchor a grain bowl. Spoon cooked rice, couscous, barley, or another grain into a bowl, then add sprouts, a protein you enjoy, and a simple dressing. Chickpeas, lentils, eggs, chicken, and tofu can all work. Choose one main flavor direction so the meal feels coordinated instead of becoming a collection of unrelated leftovers.

For pasta, reserve a little cooking water and combine it with olive oil, lemon, and grated cheese to make a light coating. Fold in chopped roasted sprouts near the end so they keep some texture. For a sandwich, layer cooled sprouts with a creamy spread and a contrasting crisp vegetable. Chop large pieces first so the filling is easy to bite through.

Roasted sprouts also work on pizza, but avoid piling a thick mountain over the dough. Use a thin layer of partially or fully cooked sprouts, depending on your pizza method, and keep the other toppings balanced. Too much wet sauce or heavy topping can soften the base. Add delicate finishes such as herbs and lemon after the pizza leaves the oven.

Preparing ahead without losing everything you like

You can trim and cut the sprouts ahead, then refrigerate them in a covered container. Keep them dry and follow your normal produce-storage practices. Measure seasoning and prepare any finishing sauce separately. When dinner approaches, all that remains is to heat the oven, toss the vegetables, and spread them on the tray.

For the best texture, roast close to serving time. If you need to cook earlier, let the sprouts cool briefly and refrigerate promptly rather than leaving them on the counter for hours. Reheat in a hot oven or air fryer, watching carefully. A microwave is convenient, but it usually softens crisp edges. Choose the method that suits the meal and your expectations.

Troubleshooting common results

If the sprouts are pale and soft, check for crowding, excess surface water, and insufficient heat. If the outside is dark but the middle stays hard, cut the next batch smaller or reduce the heat slightly after the initial browning. If the tray tastes greasy, use less oil and make sure it is distributed evenly rather than collecting underneath a few pieces.

If the flavor seems flat, try a small amount of acid before adding more rich ingredients. If the sprouts taste unpleasantly bitter to you, more thorough browning and a balanced finish may help, but personal taste varies. You do not need to pretend that one method will make everyone love the same vegetable. Serve a small portion and let people decide.

A practical plan for your first batch

Keep the first attempt simple: one tray, salt, pepper, oil, and lemon. Write down the size of the sprouts, the temperature you used, and when they looked ready. That quick note is more useful than comparing your oven with a photograph taken under different conditions. On the next batch, change only one thing, such as the finish or the cut size.

Serve the sprouts while the edges are still lively, with sauces and toppings nearby. Invite people to taste before adding extras. A well-roasted sprout can stand on its own, but the real advantage of this method is flexibility. Once you understand drying, spacing, and checking for doneness, you can build a version that fits your kitchen, your dinner, and the people around your table.

Before you bring the tray to the table

Check that the larger pieces are tender, transfer the sprouts to a wide serving dish, and keep the crisp leaves on top. A deep covered bowl traps steam and quickly softens those leaves. If the main dish needs a few more minutes, leaving the sprouts spread out briefly is usually better for texture than sealing them under a lid.

There is no need to buy special equipment for this approach. A sound tray, a sharp knife, a bowl, and a little attention are enough. Start with the tools you already own, make space for the vegetables, and use your senses as the final cooking guide. The best batch is the one you enjoy eating and can comfortably make again.


Original editorial guide. Topic source: article shared in Recipes from Grandma. Additional explanations and practical examples have been written for this guide.